As a marketing and communications firm, our team members collaborate on a variety of projects on a daily basis: PR, rebranding, web design and development, and email marketing to name just a few. Some of our team members work remotely, so it’s crucial that we have a web-based tool that allows us to coordinate and track client deliverables precisely and in real time.
Recently we began using Trello, an online collaboration tool, and so far we love it. It has some great user-friendly features to keep us as efficient as possible, but it also captures the level of detail we need for every project to ensure nothing falls through the cracks.
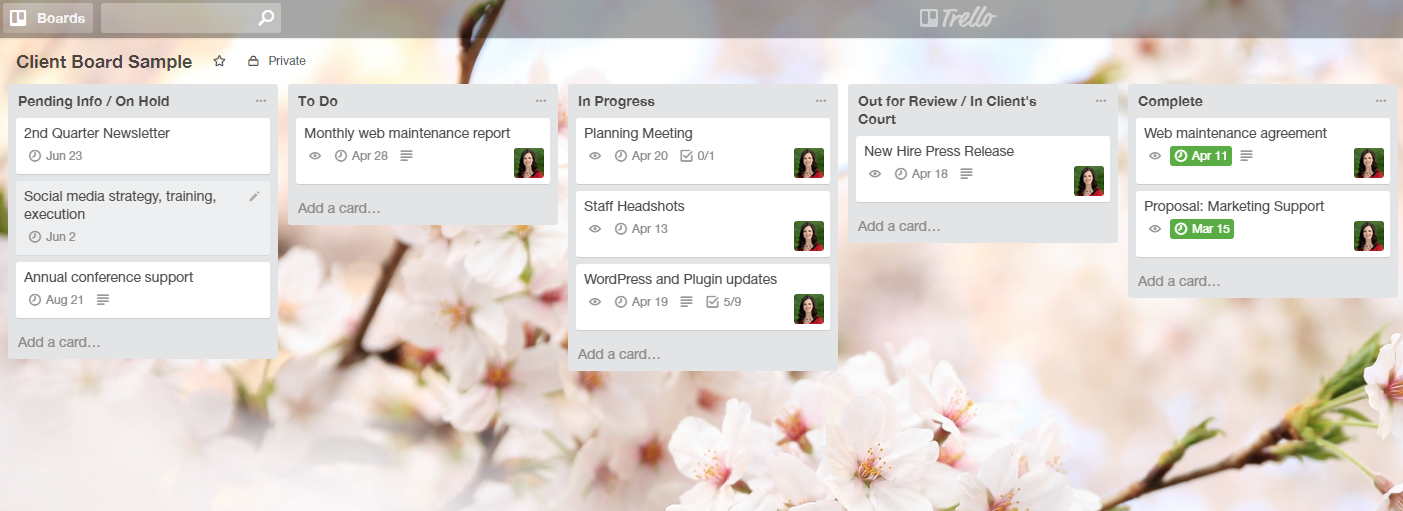
In Trello you create Boards. Within Boards you create Lists and within Lists you create Cards. You can use these however you wish, but we use them this way:
Boards = Clients
Lists = Status categories of projects (i.e. on hold, to do, in progress, etc.)
Cards = Projects and tasks for that client
Below is a sample to demonstrate how we have Trello set up.
Click to view larger
12 Tips & Tricks
The following tips have helped our team make the most use of the free version of Trello. There are many others you can explore in their Help section, but I’ve found these to be most helpful for day-to-day use.
When creating boards, be sure to add team members. You cannot assign cards to them until you do. Do this by clicking ‘Show Menu’ in the upper right corner of your Board. Then ‘Add Members’ and simply begin typing their name or email. NOTE: if they are not yet using Trello, it will give you an option to send an invite.
Assign team members to each card. Failure to do so could result in tasks slipping through the cracks because there is no one to remind and the cards will not show up in filtered views. You can do this several ways, but I think the easiest is to hover over a card and type ‘m’ to open the Members dialog box. Then begin typing team members names and select as appropriate.
Assign due dates to cards. This allows you to receive notifications when deadlines are approaching. It also helps when filtering cards by due date so you can easily prioritize. A quick, easy way to do this is to hover over a card and type ‘d’ to open the due date calendar and choose your date.
Createchecklists within cards to manage sub-tasks. When the card is open, click ‘Checklist’ and give it a name. Adding items to the list is easy. Simply type and hit return to enter another. You can create multiple checklists within a card, which is handy if you need to categorize them. For instance, for a web development project we create separate checklists for pre-launch, launch, and post-launch. Also, if you have repeating projects for a client where the checklist stays the same each time, you can copy items from a previous list. NOTE: Currently you cannot assign individual checklist items to team members or set a due date, however Trello says they are working on a solution for that.
Mention team members in checklist items and comments. To do this, type ‘@’ and then begin typing their name. As you type, matching team members will appear so you can select the correct name. Team members are notified when they are tagged.
Move a card from one list to another by simply clicking and dragging it to the new list.
Quickly filter Trello to view all cards assigned to you. Click your name in the upper right corner and select ‘Cards.’ From there you can sort by due date or board.
Add an Avatar for easy recognition of team member card assignments.
Personalize boards and cards. You can assign a background color or image to boards for quick and easy distinction. You can also use labels within cards to color code types of tasks.
Attach files or images to cards for easy access by team members. You can drag and drop files from your file explorer, or use the ‘Attachment’ button within the card to navigate and upload your file.
Mark tasks complete. This may seem like a no-brainer, but I was dragging tasks to my ‘Complete’ list, but forgot to check the box next to the due date. So when I would filter to look at my cards, I had several showing up that were completed and not marked as such.
If you like to use keyboard shortcuts like me, there are plenty available. I’ve outlined some of the ones I use most below. You can find a full list here.
Tap the spacebar when hovered over a card, or when it is open, to assign the task to you.
Press escape to exit an open card.
Type ‘B’ to open the Boards menu.
When in a card, press ‘D’ to open the due date picker.
Press ‘M’ in a card to open the add/remove members menu.
Press ‘Q’ within a board to filter and show only cards assigned to you.
If you’re often on the go, you can download the Trello app, which has full capabilities so you can easily keep boards updated. With a paid version, you can also add Power-Ups to integrate with other applications, such as DropBox, Google Drive, Slack, MailChimp and many more.
If you are looking for a project management tool, I highly recommend Trello. It’s free, easy to use and really helps us keep our client deliverables on track. The above tips touch on just some of Trello’s capabilities. Visit Trello’s knowledge base to learn more.